Precision acrylic machining requires a solid understanding of material behavior, tooling choices, and controlled process parameters.I had summarized key acrylic properties, suitable material types, machining strategies, tool and parameter selection, finishing methods, troubleshooting practices, and common applications—helping designers and engineers quickly master the essentials for producing high-quality acrylic components.
What Is Acrylic
Acrylic, also known as PMMA or plexiglass, is a transparent thermoplastic featuring excellent optical clarity, good mechanical strength, and outstanding machinability. In my manufacturing experience, understanding acrylic’s material behavior is the key to achieving high transparency and stable dimensional accuracy.
Common Alternative Materials In Acrylic Machining
| Material | Key Advantages | Impact Resistance | Machinability | Typical Applications | Cost Level |
| Polycarbonate (PC) | High toughness, heat-resistant, excellent outdoor durability | About 250× stronger than acrylic | Good machinability but prone to melting if overheated | Safety shields, eyewear lenses, machine guards, lighting housings | High |
| ABS | Cost-effective, strong impact resistance, good dimensional stability | Good impact resistance | Easy to CNC machine, ideal for injection-molded mass production | Automotive parts, consumer electronics housings, structural components | Low |
| PETG | Flexible, crack-resistant, thermoformable, user-friendly | Medium to high impact resistance | Easy to cut, heat-bend, and form into complex shapes | Signage, packaging, covers, display products | Medium-low |
| Acrylic (PMMA) | 92% transparency, excellent appearance, optical-grade machinability | Moderate impact resistance | Requires heat control during machining, ideal for high-appearance parts | Display stands, optical elements, medical windows, decoration pieces | Medium |
Material Properties Of Acrylic
Density: 1.18 g/cm³, making acrylic significantly lighter than glass while maintaining strength, which is advantageous for lightweight applications.
Tensile Strength: Ranges from 8,000 to 11,000 psi, ensuring it can withstand stress without breaking, offering greater durability compared to glass.
UV Resistance: Acrylic boasts excellent UV resistance, with the ability to withstand prolonged exposure to sunlight, making it ideal for outdoor signage, automotive components, and medical equipment.
Impact Resistance: Though more impact-resistant than glass, acrylic is less resistant than polycarbonate, which means it is more prone to cracking under high impact or stress.
Acrylic’s combination of lightness, strength, and clarity makes it a popular choice for a wide range of applications, though care should be taken in high-impact situations where polycarbonate might be a more suitable alternative.
What Is CNC Acrylic Machining
CNC acrylic machining refers to the process of transforming acrylic (PMMA) raw material into high-precision, high-transparency components using equipment such as CNC mills, laser cutters, engravers, drills, and turning machines. Compared with traditional manual fabrication, CNC machining delivers tighter tolerances, superior repeatability, and optical-grade edges and surfaces.
Common Machining Processes Used For Acrylic
When machining acrylic, I typically select the appropriate process based on part geometry, transparency requirements, and final application. Below are the most widely used precision machining methods:
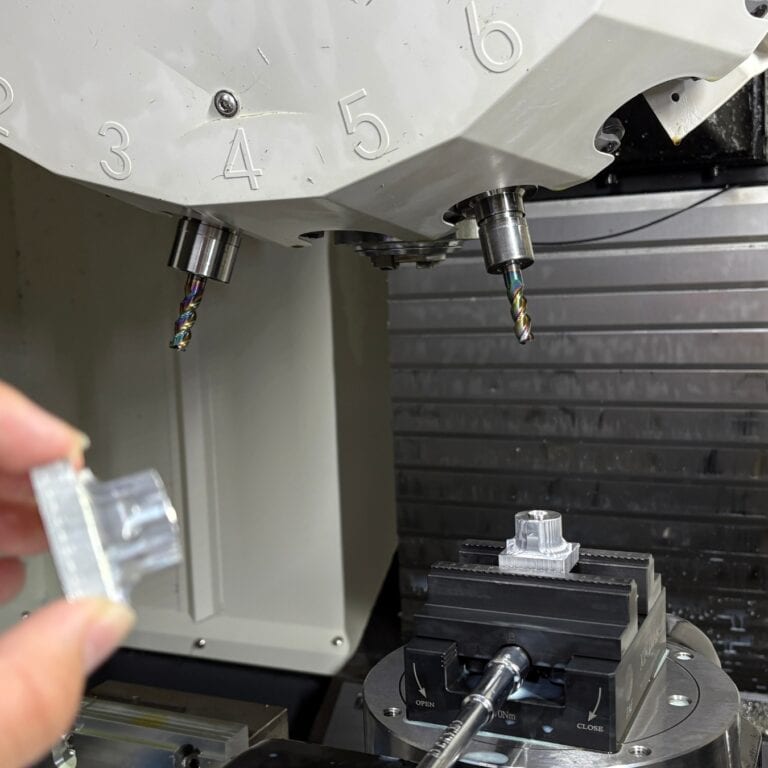
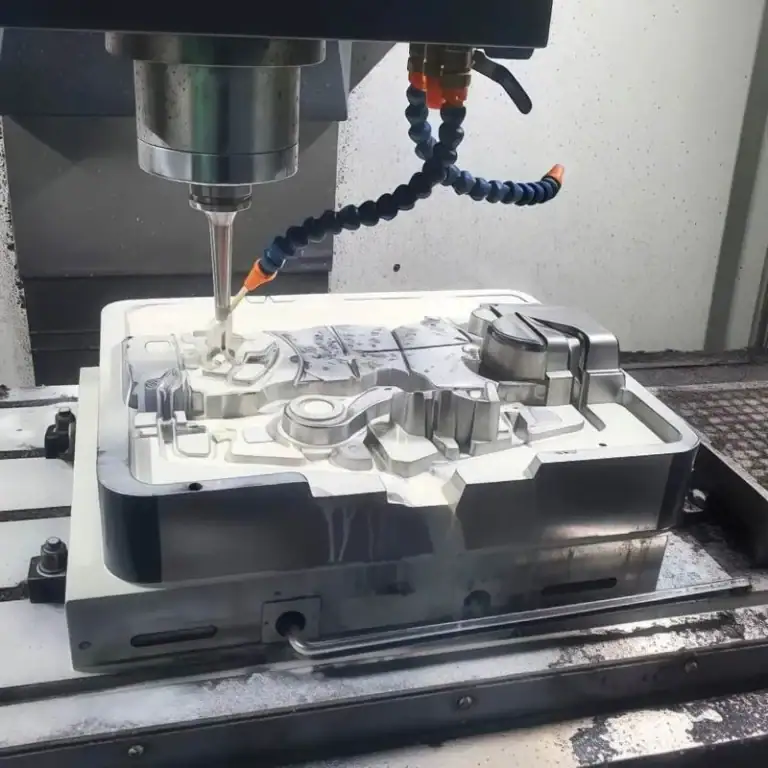
CNC Milling
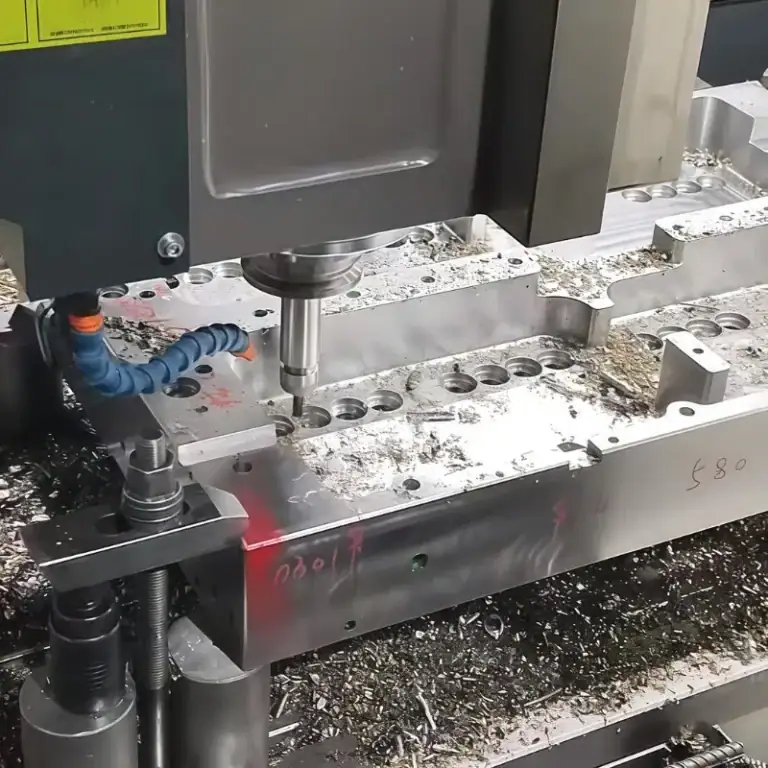
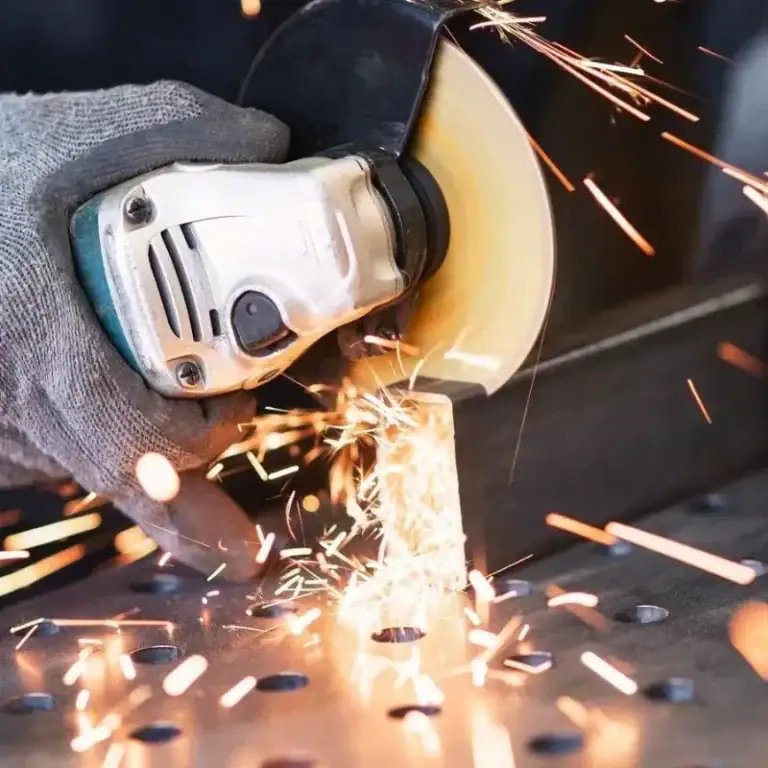
CNC milling removes acrylic material through high-speed rotation of an end mill. The cutting edges follow programmed toolpaths and shave away material layer by layer. The core principle is “chip-based cutting,” where sharp positive-rake edges cleanly slice the material so it exits as chips rather than melting. This method excels in flat surfaces, pockets, chamfers, and complex 3D geometries.
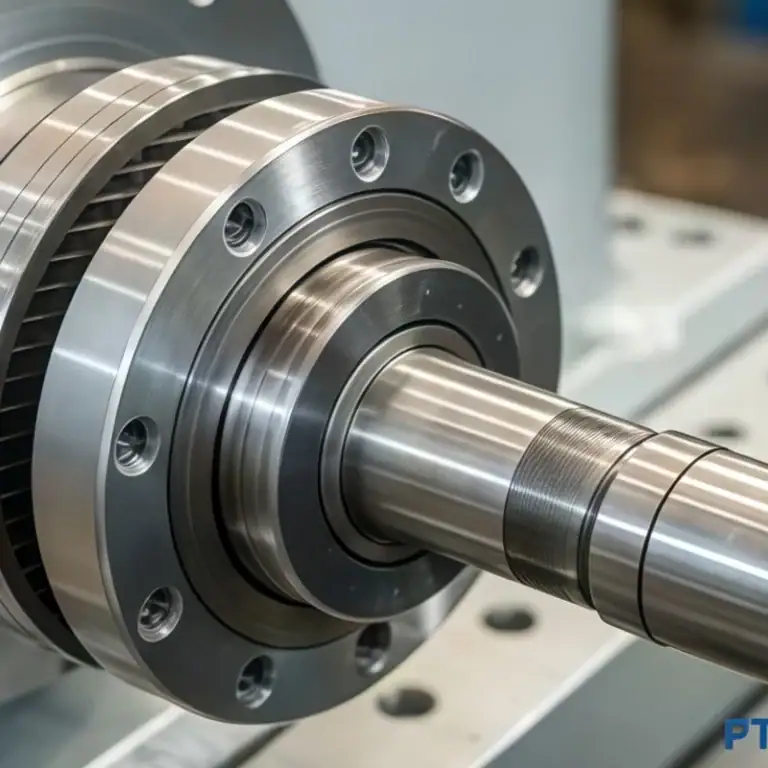
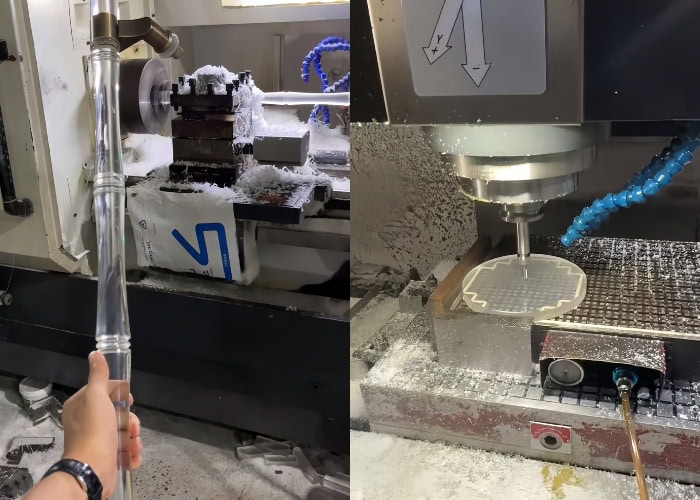
CNC Turning
CNC turning rotates acrylic rods or tubes at high speed while the cutting tool remains stationary and gradually feeds into the material. This produces cylindrical features, steps, grooves, and internal bores. Because the workpiece rotation generates stable cutting forces, turning is ideal for optical rings, transparent tubes, and precision sealing components.
Laser Cutting
Laser cutting uses a CO₂ laser beam to instantly heat the acrylic surface, causing material to vaporize or melt and be expelled from the kerf. The mechanism is thermal material removal through light-to-heat energy conversion. It produces clean, glossy edges but is limited to 2D plane cutting only.
Engraving & Marking
Engraving uses micro-diameter cutters or laser beams to remove a very thin layer of surface material, creating shallow grooves, textures, patterns, or light-guide paths. The mechanism is “micro-cutting” or “micro-melting,” widely applied to logos, identification marks, and decorative features.
Drilling
Drilling uses a tapered-edge drill bit to penetrate acrylic with axial force while rotating. Continuous chip evacuation keeps the cut stable. This process forms precise holes and countersinks commonly used in assembly, mounting, and enclosure structures.
Heat Bending & Thermoforming
When heated to its softening point (about 150–160°C), acrylic becomes pliable and can be bent or molded using fixtures. The principle relies on thermal relaxation of PMMA molecular chains, allowing them to realign under external force. Thermoforming and molding are suitable for large panels and mass-produced components.
Advantages And Limitations Of Precision Acrylic Machining
Advantages
Optical-grade finish
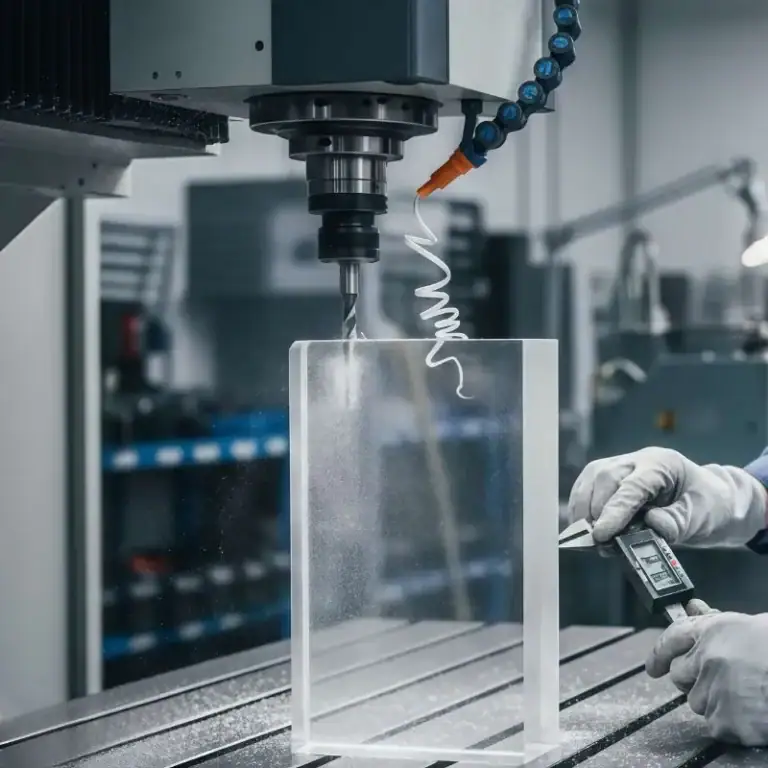
CNC machining combined with vapor polishing can achieve near-glass transparency (92%). For medical customers, we routinely achieve tolerances of ±0.05 mm on clear viewing windows.
Highly repeatable for complex features
Compared with laser cutting, CNC supports 3D features such as steps, recesses, fillets, chamfers, and precision slots.
Lightweight and efficient to process
Acrylic is 50% lighter than glass and offers easier polishing compared with polycarbonate, reducing machining and logistics costs.
Limitations
Prone to cracking or stress-whitening
Especially with extruded acrylic, improper feed rates or dull tools can cause chips, crazing, or whitening along edges.
Narrow thermal processing window
Above ~90°C, acrylic begins to melt and form sticky edges, making air cooling and fast chip evacuation essential.
Lower impact resistance
Acrylic is not suitable for high-impact environments, polycarbonate (PC) should be used when toughness is a priority.
What Types Of Acrylic Materials And Supply Forms Are Suitable For Machining
Selecting the right type of acrylic and its proper supply form is essential for achieving machining accuracy, optical clarity, and overall part stability. Different acrylic grades vary significantly in internal stress, optical performance, and machining behavior, while various supply forms determine the feasible part size and machining strategy.
Acrylic Material Types
Cast Acrylic (Cell-Cast Acrylic)
Cast acrylic is produced by curing liquid PMMA resin inside a mold, resulting in low internal stress and excellent optical uniformity.
Machining behavior: It fractures cleanly during cutting, providing more stable tool engagement and less melting.
In my projects, I almost always choose cast sheets for optical panels because their edges can be polished to near-glass clarity.
Extruded Acrylic
Extruded acrylic is made by pushing molten PMMA through an extrusion die, which introduces higher internal stress.
Machining behavior: More prone to melting, whitening along toolpaths, and heat-related deformation, requires enhanced cooling.
It is suitable for housings, display covers, and low-precision transparent components.
Continuous Cast Acrylic
This material is produced using a continuous belt-casting process, offering characteristics between cast and extruded acrylic.
Machining behavior: Exhibits superior dimensional stability and tighter thickness tolerances, ideal for large CNC-milled panels.
Modified Acrylic, Composite Acrylic, and Co-extruded Sheets
These materials include impact modifiers, flame retardants, or layered structures that enhance performance.
Impact-modified acrylic, for example, is commonly used for protective shields—but requires shallow cutting depths to avoid interlayer cracking.
Frosted, Textured, Colored, and IR-Transmitting Acrylic
These refer to functional or aesthetic variations of standard acrylic.
Frosted sheets work well for engraving and backlit signage
Colored sheets are widely used for displays and branding
IR-transmitting sheets are ideal for sensor windows
Their machining principles match clear acrylic, though the visual outcome differs.
Acrylic Supply Forms Suitable For CNC Machining
Sheets
The most common form, ideal for laser cutting, CNC milling, engraving, and other planar machining.
I typically work with 1 mm–30 mm sheets, covering applications from display panels to enclosures and optical windows.
Rods
Used for CNC turning to create cylinders, lenses, rollers, and mechanical connectors.
Rods offer excellent uniformity, enabling stable high-speed rotation with minimal eccentricity or vibration.
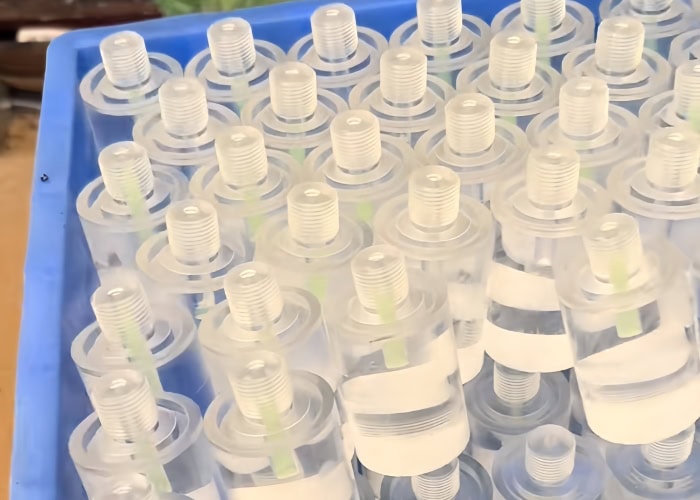
Tubes
Suitable for fluid conduits, lighting tubes, and protective enclosures.
They maintain roundness during turning and cutting, but fixturing must avoid deformation from clamping pressure.
Blocks and Discs
Ideal for thick components or optical parts such as lenses or light-guiding cubes.
These require multi-step cutting to prevent internal stress from causing cracks during machining.
Profiles and Custom Extrusions
Designed for tracks, channels, frames, and display structures with special cross-sections.
Machining principles are similar to flat sheets, but fixturing must provide full support to avoid twisting or warping.
What Are The Key Material Properties To Consider When Machining Acrylic
Acrylic (PMMA) is well-suited for precision machining because of its high optical clarity, rigidity, and predictable cutting behavior. However, it is also sensitive to heat, stress, and cracking. Understanding its material properties enables engineers to make accurate decisions during design and machining—reducing defects while improving surface quality, transparency, and dimensional accuracy.
Physical & Mechanical Properties Of Acrylic
| Property | Typical Value | Impact on Machining |
| Tensile Strength | 60–75 MPa | Hard and stable during milling, but prone to brittle fracture under excessive load |
| Elastic Modulus | 2.5–3.5 GPa | High stiffness helps maintain dimensional precision |
| Impact Strength | ~15–20 kJ/m² | Moderate toughness—requires heat control during high-speed cutting to avoid cracking |
| Density | 1.18 g/cm³ | Lightweight, ideal for displays and structural components |
| Rockwell Hardness | M90 | Surface is relatively hard but scratch-sensitive, protective film recommended |
Thermal Properties & Heat-Related Behavior
Acrylic is a thermoplastic material and reacts strongly to temperature changes.
Vicat Softening Temperature: ~100°C
Excessive friction during CNC machining can soften the surface, causing melting or deformation.
Melting Point: ~160°C
With improper energy control—especially in laser cutting—melting pits or burn marks can occur.
Coefficient of Thermal Expansion: 70–80 × 10⁻⁶/°C
Large thermal expansion makes acrylic suitable for room-temperature machining, but not for high-temperature assembly environments.
Machining insight:
I once machined a batch of thick acrylic panels where excessive cutting depth caused heat buildup. The edges turned white—a typical micro-cracking symptom caused by thermal stress. Since then, I always recommend multi-step cutting with strong air cooling.
Optical Properties And Clarity Requirements
Acrylic’s biggest advantage is its optical transparency.
Light transmittance up to 92%, comparable to glass
Refractive index 1.49, ideal for light-guiding structures and LED components
Can be polished to an optical-grade finish (Ra < 0.01 μm)
Supports flame polishing, vapor polishing, and diamond finishing
Machining insight:
When producing display panels or optical components, customers often worry about visible tool marks. With optimized toolpath strategies (contour finishing, constant-scallop paths) and post-polishing, clarity can be significantly improved.
Chemical Stability And Environmental Resistance
Acrylic provides strong resistance to many common chemicals:
Good resistance to weak acids and alcohols
Sensitive to hydrocarbons, which may cause stress cracking
Better UV resistance than polycarbonate—does not yellow under sunlight
Excellent weatherability, maintaining clarity outdoors for long periods
Practical example:
Outdoor lightboxes almost always use cast acrylic because it stays clear under UV exposure, while PC tends to yellow more quickly.
Sensitivity to Stress, Cracking, And Stress Whitening
The most common failure mechanism in acrylic machining is crazing—stress-induced whitening, micro-cracks, or fractures.
Common causes include:
Dull tools causing compressive cutting rather than clean shearing
Excessive clamping pressure during fixturing
Residual internal stress from non-annealed material
Heat buildup leading to thermal stress
Contact with solvents such as alcohol or gasoline
Engineering insight:
I once produced a batch of transparent instrument windows where the customer insisted on using non-annealed material. During assembly, tightening screws caused whitening around the edges. For parts with threaded holes or fastening features, I now always recommend adding radii or choosing impact-modified acrylic.
What Are The Main Processes In CNC Acrylic Machining
CNC acrylic machining requires precise toolpath planning, stable fixturing, and strict heat control, as PMMA is highly sensitive to temperature, cutter sharpness, and mechanical stress. A proper workflow—from programming and material preparation to finishing—determines the final clarity, edge quality, and dimensional stability of the part.
Process Planning & CNC Programming
Effective programming is the foundation of high-quality acrylic machining. The key principles are minimizing heat buildup, ensuring continuous chip removal, and reducing tool re-engagement stress.
Prevent heat accumulation:
Acrylic heats quickly due to friction, so toolpaths must use layered cutting, separate roughing and finishing, and avoid repeated cutting in the same area.
High spindle speed and fast feed:
Typical acrylic machining uses 10,000–24,000 rpm, allowing faster chip removal and reducing melting risks.
Smooth toolpaths:
Arc transitions and constant-scallop strategies help avoid stress marks and keep edges smooth.
Air-cut and chip-clearing toolpaths:
When machining light-guide plates, I often add “air passes” to blow chips away and cool the cutting zone, significantly reducing white edges.
Material Preparation & Rough Processing
Material preparation directly affects internal stress, deformation, and the stability of the machining process.
Common cutting methods:
Laser cutting: Fast but produces a heat-affected zone.
Saw cutting: Low cost but not very precise.
Waterjet cutting: Clean edges but higher cost.
Leave 1–2 mm machining allowance:
This ensures the finishing pass can produce an optical-grade surface.
Keep protective film:
For large sheets, I always keep the film on until the final polishing stage to avoid surface scratches during handling.
Finishing & Forming
This stage determines the final clarity, dimensional accuracy, and surface quality of acrylic parts.
Use single-flute or polished-edge end mills:
Sharp tools generate a clean shearing cut instead of melting, preventing white edges and micro-cracks.
Layered finishing strategy:
Each cut should be 0.2–0.6 mm to minimize heat buildup.
Balance feed and speed:
Too fast → melting
Too slow → tearing or chipping
Proper tuning depends on thickness, cutter geometry, and part design.
Vacuum fixturing with soft pads:
When making transparent housings, I use vacuum fixtures combined with soft pads to avoid stress whitening caused by clamp pressure.
Stress Relief & Final Finishing
Finishing is essential for achieving optical-grade clarity and long-term stability.
Annealing (Stress Relief):
Heating acrylic at 80–90°C for 2–4 hours removes internal stress and prevents cracking during assembly.
Polishing methods:
Mechanical polishing: Ideal for large flat surfaces.
Flame polishing: Produces clear, glossy edges.
Vapor polishing: Achieves true optical-grade clarity for lenses and light-guide parts.
Anti-static finishing:
Acrylic easily attracts dust. Before delivering transparent covers, I always apply an anti-static treatment to keep the surface clean and visually flawless.
What Are The Key Parameters To Consider When Machining Acrylic
Acrylic (PMMA) is a thermoplastic material that is highly sensitive to cutting heat, tool sharpness, and clamping pressure. Therefore, choosing the right feed rate, spindle speed, depth of cut, tooling, and cooling strategy is essential for achieving clear edges, burr-free surfaces, and crack-free results.
Tool Selection For Acrylic Machining
Tool Geometry and Cutting Edge Design
The most critical principle in acrylic machining is sharpness.
Tools must have polished cutting edges to reduce friction and avoid micro-cracks.
A large rake angle (~5°) helps produce a lighter cutting action and reduces stress whitening.
In one of my light-guide plate projects, a standard end mill caused visible drag marks. After switching to a polished single-flute cutter, edge clarity improved dramatically.
Single-Flute, Double-Flute, Up-Cut, Down-Cut Options
Single-flute end mill (most recommended):
Best chip evacuation, ideal for producing crystal-clear edges.
Double-flute end mill:
Suitable for roughing, but generates more heat.
Up-cut bit:
High chip removal efficiency, suitable for thick sheets.
Down-cut bit:
Presses material downward, ideal for thin sheets to prevent lifting.
Straight bit:
Good for 2D contouring, but yields slightly lower clarity.
Tool Materials and Coatings
Carbide is the best choice—sharp, durable, and heat resistant.
Coated tools are not recommended, as coatings may dull the cutting edge.
Diamond tools are suitable for optical machining but come with higher cost.
Feed Rate And Spindle Speed Guidelines
Parameter Ranges by Thickness and Geometry
Acrylic cutting emphasizes high spindle speed and fast feed rate.
Typical settings:
Spindle speed: 10,000–24,000 rpm
Feed rate: 800–2,200 mm/min
Depth of cut: 0.2–1.0 mm (depending on tool diameter)
For thick sheets (>10 mm), layered machining is required.
Each layer’s depth should be 10–20% of the tool diameter.
Cutting Depth and Layering Strategy
Roughing depth: 0.6–1.0 mm
Finishing depth: 0.2–0.4 mm
Final pass: Leave a 0.1 mm “skin cut” to maximize transparency.
When making transparent display boxes, I typically reduce the final pass to 0.15 mm, producing an edge that looks almost polished.
Cooling, Lubrication, And Temperature Control
Cooling Methods
Dry cutting (most common):
High feed rate helps reduce heat buildup.
Air cooling (highly recommended):
Compressed air significantly decreases melting risk.
Mist cooling:
Useful for deep groove machining in thick sheets.
Liquid coolant (not recommended):
May cause swelling and reduce optical clarity.
Tips to Prevent Melting, Burrs, and Whitening
Use single-flute bits for better chip evacuation.
Increase feed speed to reduce friction dwell.
Add retract points to clear hot chips.
Avoid tool dwell inside the material.
For optical parts, I often combine continuous air cooling with a “chip-fling” motion at the end of each layer, which reduces melting and improves clarity.
Fixturing And Workholding
Vacuum Fixtures & Soft Pads
Vacuum tables are ideal for thin sheets, preventing vibration and warping.
Soft pads (EVA or rubber) reduce clamping-induced stress.
Support Strategy for Large or Thin Parts
Large sheets require multi-point support to prevent the “drumhead effect.”
Thin sheets work best with down-cut tools to reduce edge tearing.
Avoiding Vibration and Stress Issues
Clamping force must be moderate, excessive pressure causes stress whitening.
Keeping the protective film on improves surface protection and gripping friction.
I once machined a one-meter display panel with traditional clamps, which caused whitening along the edges. Switching to a vacuum fixture completely resolved the issue.
What Are The Surface Finishing Methods in Acrylic Machining
By combining mechanical polishing, flame polishing, vapor polishing, and diamond cutting, acrylic parts can achieve glass-like transparency or customized textures such as matte and frosted finishes. In addition, annealing is essential for removing internal stress and preventing cracking over time.
Achieving Optical-Grade Clarity
To achieve optical-grade transparency (up to 92% light transmittance), every step of the machining and finishing process must focus on minimizing surface stress and thermal damage.
From my experience, the most stable method for producing mirror-grade edges is a combination of clean cutting with polished tools, annealing, and high-end polishing. This workflow is widely used for light guides, optical windows, and display-grade clear parts.
A typical clarity-focused finishing path includes:
Using polished-edge tools for lightweight cutting
Controlling heat to avoid whitening
Performing annealing to relieve internal stress
Applying flame or vapor polishing depending on the clarity requirement
Polishing Methods
Mechanical Sanding & Polishing
This method uses sandpaper (400–1500 grit) for progressive wet sanding, followed by buffing with polishing compound and a cloth wheel.
Principle: Gradually reduces surface roughness so light refracts uniformly.
Best for: Large surfaces, cover plates, flat panels.
I use this method frequently for acrylic covers when I need to completely eliminate tool marks.
Flame Polishing
A hydrogen-oxygen flame melts the surface rapidly, allowing it to flow and solidify into a glossy finish.
Principle: Instant surface melting and re-solidification.
Best for: Straight edges and external contours.
Note: Thin sheets may warp due to heat concentration.
Vapor / Solvent Polishing
Methylene chloride vapor softens the surface, allowing it to self-level.
Principle: Chemical swelling causes surface molecules to flow, creating a smooth, clear finish.
Best for: Complex geometry, inner holes, narrow channels.
I use this technique for small optical parts where extremely high clarity is required.
Diamond Turning / Diamond Polishing
A diamond-tipped tool cuts directly to produce a mirror surface.
Principle: Ultra-sharp cutting at the nanometer level.
Best for: Optical lenses, precision light-guide components.
Note: High cost, but the best clarity achievable.
Special Surface Effects & Functional Finishes
Frosted, Textured & Matte Surfaces
Achieved by frosted sheets or fine sanding to produce diffused light.
Applications: Light boxes, display panels, privacy screens.
Sandblasting & Texture Finishing
Glass beads or aluminum oxide particles create uniform micro-textures.
Principle: Micro-impact generates controlled surface pits.
Applications: Decorative parts, tactile surfaces.
Silk-Screening, Painting & Printing
Logos, labels, and graphic patterns can be added to acrylic surfaces.
Applications: Control panels, signage, branding components.
Laser Marking & Coding
Laser energy forms micro-etched markings.
Applications: Serial numbers, QR codes, part identification.
Advantages: Permanent, wear-resistant, high precision.
Annealing & Stress Relief
Annealing is essential for releasing internal stress caused by cutting, drilling, and machining.
Method: Hold at 80–90°C for several hours, then cool slowly.
Principle: Molecular chains relax and re-arrange into a stable structure.
Benefit: Greatly reduces cracking and crazing.
I once machined a batch of thick acrylic covers that developed fine cracks after a week because they were not annealed. After switching to annealed material, the issue disappeared completely.
Edge, Hole & Corner Refinement
Edge finishing includes chamfering, deburring, and precision trimming.
Chamfers reduce stress concentration and improve aesthetics
Hole refinement enhances thread strength and fit accuracy
Clean edge finishing prevents sharp edges from scratching hands
For high-end display parts, a 0.2–0.5 mm chamfer significantly improves the premium look and user experience.
What Are The Common Defects In Acrylic Machining
Acrylic machining often encounters issues such as cracking, whitening, melting, and warping. These defects are typically caused by excessive heat, dull tools, uneven clamping pressure, or improper feed and speed settings. To achieve optical-grade clarity and stable dimensions, it is essential to strictly control heat generation, cutting load, and mechanical stress throughout the entire machining process.
Common Types Of Machining Defects
Cracking, Stress Whitening, and Crazing
This is one of the most frequent problems in acrylic CNC machining, often appearing around drilled holes, sharp corners, or bent areas.
Root Causes:
Excessive heat during cutting stretches the internal molecular chains, leading to stress concentration
Uneven clamping pressure creates localized mechanical stress
Extruded acrylic contains higher internal stress, making it more prone to cracks
Real Experience:
I once machined a batch of transparent covers made from extruded sheet. After drilling, white cracks appeared around the hole edges. Switching to cast acrylic and adding an annealing step completely resolved the issue.
Melting, Burrs, and Burn Marks
Melting indicates that the cutting temperature is too high, burrs are usually caused by insufficient tool sharpness.
Root Causes:
Spindle speed too high while feed rate is too slow, causing excessive friction
Poor chip evacuation leading to recutting of hot chips
Dull cutting edges that increase heat and surface tearing
Typical Symptoms:
A glossy melted band along the edges
Localized yellowing or burn marks
Surface damage that cannot be fully removed by sanding
Warping, Deformation, and Dimensional Instability
Because acrylic has a high thermal expansion coefficient, it can deform during machining or storage if heat is not properly controlled.
Root Causes:
Localized expansion from heat buildup during cutting
Insufficient support for large thin sheets, causing vibration or sagging
Release of internal stresses in non-annealed material
Example:
When machining a one-meter-long acrylic lightbox panel, I noticed 2–4 mm warping in finished parts if vacuum suction and bottom soft pads were not used during machining.
Process Control And Prevention Strategies
Parameter Optimization and Temperature Management
Temperature is the most critical factor influencing acrylic machining quality.
Key Strategies:
Use high spindle speed combined with fast feed rate
Control depth of cut in multiple layers to avoid excessive load
Use air cooling or mist cooling to keep tool and material temperature low
For sheets thicker than 15 mm, I often use a three-stage cutting strategy, which effectively prevents melting and whitening.
Tool Sharpness, Wear Control, and Maintenance
Dull tools are responsible for many defects including whitening, melting, and burr formation.
Best Practices:
Use O-flute single-flute cutters for maximum chip evacuation
Maintain sharp cutting edges, replace tools once edge wear appears
Avoid using tools that were previously used on metal
Even microscopic nicks on the cutting edge can cause surface lines or stress concentration.
Fixturing, Support, and Clamping Optimization
Clamping directly affects stress distribution, vibration control, and surface quality.
Recommended Strategies:
Use vacuum tables for large thin sheets to avoid mechanical pressure
Include soft pads and protective film to prevent scratching and stress marks
Add side supports for long or thin parts to prevent vibration
When machining transparent display panels, I often use a combination of soft pads and light-edge clamping, which significantly reduces whitening and cracking.
FAQs
Is Acrylic Easy To Machine?
Acrylic is relatively easy to machine due to its low hardness and excellent machinability. With a tensile strength of 8,000-11,000 psi and a density of 1.18 g/cm³, acrylic can be precisely cut, drilled, and milled. Proper tooling, such as carbide or HSS cutters, ensures smooth finishes and reduces tool wear. While it’s easy to machine, careful attention to factors like feed rate, spindle speed, and cooling is crucial to prevent cracking or melting, especially for intricate designs.
What Machine Is Best For Cutting Acrylic?
The best machine for cutting acrylic is a CNC milling machine or laser cutter. CNC milling provides high precision, ideal for intricate shapes, with the ability to maintain tight tolerances of ±0.001”. Laser cutting, on the other hand, offers clean, polished edges and is excellent for detailed designs. Both methods minimize heat buildup, preventing acrylic from cracking or warping. For larger batches, laser cutting is more efficient, while CNC milling is preferred for complex, high-precision parts.
Is Clear Acrylic As Clear As Glass?
Clear acrylic is highly transparent, with light transmission up to 92%, making it almost as clear as glass. However, its refractive index of 1.49 is slightly lower than glass, which can result in minor visual distortion. Despite this, acrylic’s superior impact resistance and lighter weight make it a practical alternative to glass in many applications. While not identical in optical clarity, acrylic is often preferred for applications where durability and safety are critical, such as in windows, display cases, and signage.
How long Does Acrylic Plastic last?
Acrylic plastic is highly durable, with a typical lifespan of 10 to 30 years, depending on the environment. Its UV resistance helps prevent yellowing and degradation when exposed to sunlight. In outdoor applications, acrylic can maintain its clarity and strength for decades, making it ideal for signs, windows, and displays. Proper maintenance, such as regular cleaning, can further extend its lifespan. However, acrylic can be prone to scratching, which may affect its aesthetic quality over time.
Can I Use CNC Router Machine For Transparent Acrylic?
Yes, a CNC router machine is suitable for cutting transparent acrylic. It offers high precision, ensuring smooth edges and accurate dimensions. When using a CNC router for acrylic, it’s essential to select the right cutting tools, such as carbide bits, and optimize parameters like spindle speed and feed rate to prevent cracking or heat buildup. Additionally, using proper clamping and cooling techniques can help achieve clean cuts and preserve the material’s transparency, making CNC routers an effective choice for acrylic machining.
Conclusion
In conclusion, CNC machining provides excellent precision and consistency when working with acrylic, making it the go-to method for high-quality results. Acrylic’s superior optical clarity, combined with its versatility and ease of machining, makes it the ideal material for projects requiring transparency, durability, and a polished finish. Whether it’s for medical devices, automotive components, or eye-catching signage, acrylic is a material that stands out. If you’re considering acrylic for your next project, feel free to reach out – I’m happy to share insights on how CNC machining can help bring your vision to life with unmatched precision!