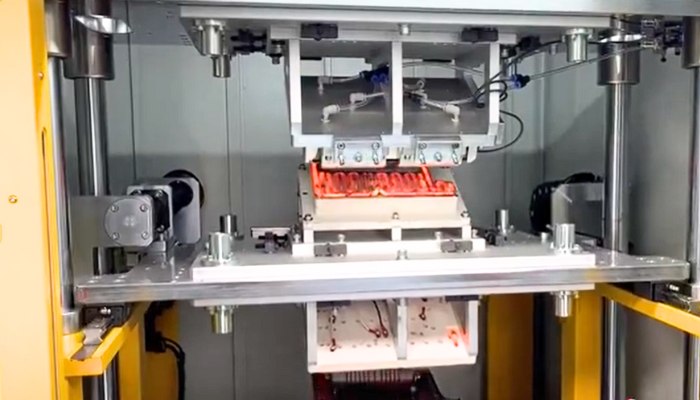
 Plastic welding is an effective method of joining thermoplastic materials through plastic heat fusion technology and is widely used in a number of applications. This article explores the technology of plastic welding, how it works, its advantages and disadvantages and its applications to help you understand its role in production more fully.
What is Plastic Welding
Plastic welding technology melts plastic by heating it. A processing method that joins two or more plastic parts together. During plastic welding, the interfaces of the plastic materials are melted by heat and then merged under pressure to form a strong joint when cooled and solidified.
Plastic Welding Technology
1. Laser Welding
Plastic laser welding is a highly efficient method of joining plastic components using a laser as a heat source. It is suitable for precise welding requirements and is especially useful in highly automated production lines.
Suitable for Laser Welding Materials
Plastics with a certain degree of laser transparency and those that can effectively absorb laser light are usually selected.
- Polycarbonate (PC)
- Polyamide (PA, Nylon)
- Polypropylene (PP)
- Polyphenylene sulfide (PPS)
- Polyetheretherketone (PEEK)
Preparation Before Welding
- Laser welding machine: including laser generator and welding system.
- Clamps: Specialized clamps suitable for the product, fixing the plastic parts to ensure precise alignment.
- Ventilation system: The welding process may produce fumes, which require a good extraction system.
- Safety equipment: such as protective eyewear to protect the operator from laser damage.
Operation Method
- Choose the right plastic material: make sure that one layer of the top and bottom plastic is transparent to the laser and the other layer can absorb the laser.
- Equipment parameter setting: adjust the laser power, speed and focal length according to the thickness and type of material.
- Aligning the material: The plastic parts to be welded are accurately aligned and usually held in place using jigs.
- Laser Welding: Start the laser machine, during the welding process, the laser penetrates the first layer of plastic and is absorbed by the lower layer, generating heat to melt and combine the plastic.
- Cooling and curing: After welding, let the parts cool naturally.
2. Hot Gas Welding
Hot gas welding, also known as hot air welding, is performed by heating plastic to its softening point using a hot air gun. Hot air welding has the advantage of being easy and inexpensive to perform, making it ideal for applications on job sites and repair work. Hot air welding has the advantage of being easy and inexpensive to perform, making it ideal for applications on job sites and repair work.
Preparation Before Welding
- Material selection: Confirm the type of plastic material to be welded and select the appropriate welding rod.
- Clean the surface: Thoroughly clean the plastic surface with appropriate cleaners to remove grease, dust and impurities.
- Equipment Preparation: Prepare the hot gas welding torch and set the appropriate temperature according to the requirements of the welding material.
- Safety measures: Wear appropriate personal protective equipment (PPE), such as gloves and goggles.
Materialien Suitable for Hot Gas Welding
Hot gas welding of plastics is particularly suitable for the following thermoplastics:
- Polyethylene (PE)
- Polypropylene (PP)
- Polyvinyl chloride (PVC)
- Polystyrene (PS)
- ABS plastic
Operation Method
- Heating: Aim the hot gas torch at the welding area, so that the plastic surface and the welding rod are gradually heated to a molten state.
- Application of welding rods: Apply welding rods uniformly over the heat-treated surface, ensuring that the rods are incorporated into the raw material.
- Continuous heating: Moving the torch and continuous supply of hot air ensures full fusion of the electrode and the base material.
- Cooling and shaping: After completing the welding, allow the weld to cool naturally to solidify the welded joint.
3. Extrusion Welding
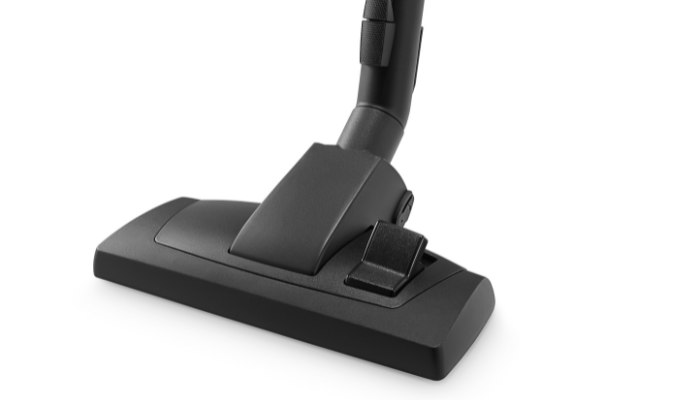
Extrusion welding uses an extruder to heat the plastic material to a molten state and extrudes the molten plastic through the extrusion head directly into the interface to be welded, solidifying and bonding the material. It is suitable for welding large or heavy components.
Preparation Before Welding
- Material selection: Ensure that the welding material is compatible with the base material.
- Clean the work surface: Clean the surface to be welded of dust, grease and other pollutants.
- Equipment Inspection: Check the extrusion welding machine and related equipment for proper operation, including the heating system and extrusion machinery.
- Temperature setting: set the temperature of the extruder according to the melting point of thematerial.
- Safety measures: Ensure that operators wear appropriate protective equipment, such as gloves and goggles.
Materials Suitable for Extrusion Welding
Extrusion welding is suitable for a wide range of thermoplastics, notably:
- Polyethylene (PE)
- Polypropylene (PP)
- Polyvinyl chloride (PVC)
- Polycarbonate (PC)
- ABS
Operation Method
- Heating: Plastic granules or powders are heated to the proper temperature through the extruder.
- Extrusion: Extrude the molten plastic evenly through the extruder head to the joint to be welded.
- Compaction: Use rollers or platens to apply pressure on the extrudate to ensure a good bond between the molten plastic and the substrate.
- Cooling: Allow natural cooling and curing of welded parts.
4.Ultrasonic Welding
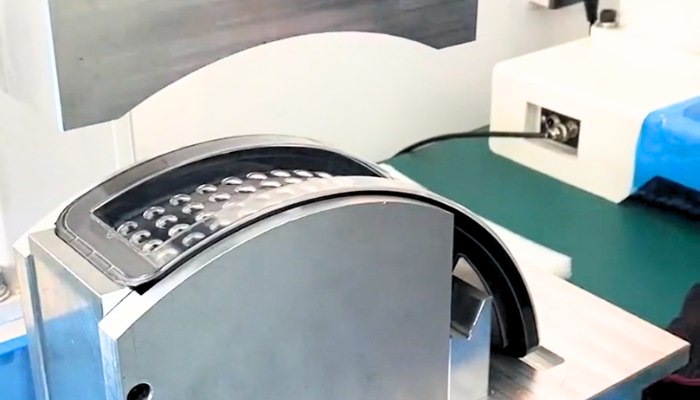
Ultrasonic welding is an industrial welding technique that utilizes heat generated by high-frequency sound wave vibrations to heat and join plastics or other fusible materials. It is suitable for use in many manufacturing and production environments and is particularly popular in the plastics industry.
Preparation for Welding
- Material Selection and Evaluation
- Confirm the thermoplasticity of the selected material and consult the material’s datasheet for its thermal welding properties.
- The materials selected should have similar melting points to ensure uniform heating and fusion during the welding process.
- Design Considerations
- Welded joints should be designed to optimize energy guidance and distribution, such as the design of the Energy Director, a pre-set protrusion on the weld surface that concentrates the welding energy, accelerates the welding speed and improves the strength of the weld.
- Ensure that there is an appropriate joint design, such as a lap weld, end weld, or spot weld design, to facilitate the transfer of ultrasonic energy.
- Surface Preparation
- Clean the surface of the material to be welded, using a non-woven cloth or a suitable cleaner to remove grease and dust.
- Check the fit and alignment of the workpiece to ensure that the workpiece does not move during the welding process.
- Equipment Settings
- Select appropriate welding molds and fixtures based on material type and joint design.
- Adjust the frequency and amplitude of the ultrasonic welding machine, usually in the frequency range of 20 kHz to 40 kHz.
Materials Suitable for Ultrasonic Welding
Ultrasonic welding is suitable for a wide range of thermoplastics:
- Polyethylene (PE)
- Polypropylene (PP)
- Nylon
- Polystyrene (PS)
- Polycarbonate (PC)
Operation Method
- Adjustment Parameters
- The welding time and pressure are adjusted according to the size of the workpiece and the thickness of the material. The welding time is usually within a few seconds.
- Sets the amplitude of the ultrasonic vibration. The parameter determines the amount of energy input.
- Welding Process
- Before welding begins, place the workpiece in the positioning fixture to ensure precise alignment.
- The ultrasonic generator is activated and the ultrasonic head begins to move downward until it contacts the workpiece.
- The combination of ultrasonic vibration and pressure on the workpiece causes the material to rapidly melt and fuse at the point of contact.
- After the welding operation, maintain pressure until the welded joint cools and solidifies.
5. Vibration Welding
Vibration welding is a thermoplastic welding technique that uses mechanical vibration, usually linear, to generate heat at the weld interface. In this method, the contact surfaces of two workpieces are subjected to vibration to generate frictional heat, and when sufficient temperature is reached, the materials begin to melt and fuse.
Preparation Before Welding
- Material selection: Ensure that the material to be welded is thermoplastic.
- Design optimization: The welding surface should be designed to ensure that there is sufficient contact area and fit clearance.
- Cleaning: Clean the fixture and workpiece surface to remove oil, dust or other impurities.
- Equipment parameter settings: adjust the vibration frequency and amplitude of the welding equipment, as well as the pressure applied.
Materials Suitable for Vibration Welding
Materials commonly used for vibration welding, including
- ABS
- Polycarbonate (PC)
- Nylon
- Polypropylene (PP)
- Polystyrene (PS)
Operation Method
- Positioning: Secure the workpiece in the welding fixture to ensure alignment.
- Start the unit: turn on the vibration and apply appropriate downforce.
- Welding: Continuous vibration until the material melts and begins to fuse at the contact surface.
- Cooling: Stop vibration and continue to apply pressure to ensure that the welded joint cools and cures.
- Inspection: Check the quality of welding to ensure that there are no defects.
6. Rotary Welding
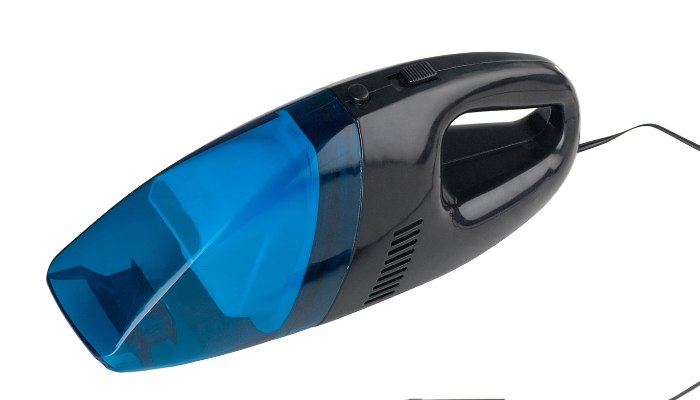
Rotational welding is a welding method that generates frictional heat by rotating one or two thermoplastic parts and applying pressure to the contact surfaces. This method is suitable for cylindrical or axially symmetrical workpieces.
Preparation Before Welding
- Material selection and inspection: Confirm that all workpieces are suitable for rotary welding, usually cylindrical thermoplastic parts.
- Clean the workpiece: Thoroughly clean the welding surface of the workpiece to avoid grease and dust.
- Equipment Adjustment: Set the rotation speed and applied pressure.
Materials Suitable for Rotary Welding
Usually used for larger, harder plastic materials such as:
- Polyethylene (PE)
- Polypropylene (PP)
- Polyurethane (PU)
Operation Method
- Mounting the workpiece: Mount the workpiece in the rotary fixture.
- Start Spin: activates the spin button.
- Apply pressure: Apply pressure on the contact surface of the workpiece to generate sufficient frictional heat.
- Maintain conditions: Maintain rotation and pressure until material melts.
- Cooling and curing: Stop rotation and maintain pressure until the welded joint is completely cooled and cured.
7. Infrared Welding
Infrared welding is a welding technique that utilizes infrared radiation to generate heat that melts the contact surfaces of plastic materials. This method is particularly suitable for complex welded joints and high strength welding needs, and is commonly used in industries such as automotive, aerospace and medical devices.
Preparation Before Welding
- Material Selection
- Verify that the plastic or other material used absorbs infrared radiation and melts at the contact surface. Materials suitable for infrared welding typically include polyethylene (PE), polypropylene (PP), polycarbonate (PC), and others.
- Cleaning Workpieces
- Equipment Settings
- The intensity of the infrared radiation and the temperature of the welding zone are set according to the type and thickness of the material.
- Adjust welding equipment to fit the size and shape of the workpiece.
- Security Measures
- Ensure that the operating area is well ventilated and that protection is in place to prevent direct exposure of the operator to infrared radiation.
Operation Method
- Aligning the Workpiece
- Place the workpiece to be welded in the appropriate position on the welding machine, making sure that the welding surfaces are precisely aligned.
- Activation of Infrared Radiation Sources
- Turn on the infrared radiation source and preheat to the set temperature. Infrared lamps usually require a period of preheating to reach a stable operating temperature.
- Melting Stage
- The contact surfaces of the workpiece begin to melt under the influence of infrared radiation. Depending on the material, this process can take anywhere from a few seconds to tens of seconds.
- Pressurization and Cooling
- Once the material has melted, the workpieces are quickly pushed into contact with each other, applying the appropriate pressure to form a weld.
- Maintain pressure until the welded joint cools and solidifies, ensuring a quality weld.
- Inspection and Reprocessing
- Check the quality and consistency of welded joints.
- Clean up any spilled material and perform any necessary reprocessing.
8. Hot Plate Welding
Hot plate welding, also known as heated tool welding, involves placing a heated tool on or near two surfaces to be joined in order to melt them. The heat source is then removed and the surfaces are joined together under pressure. This technique is suitable for welding plastic parts with complex shapes or large sizes, and is commonly used in automobiles, appliances and containers, among others
Preparation Before Welding
- Material Selection
- Choose a thermoplastic suitable for hot plate welding, commonly used materials include polyethylene (PE), polypropylene (PP), polycarbonate (PC) and nylon.
- Cleaning Parts
- Clean the surfaces of the parts to be welded, removing all dust, grease and other contaminants.
- Equipment Settings
- Adjust the temperature setting of the hot plate to ensure that it matches the melting point of the material being used.
- Ensure that the hot plate is flat and clean to avoid undesirable effects during the welding process.
- Security Preparations
- Ensure that the operating environment is well ventilated to prevent burning of the plastic or generation of harmful gases.
- Operators should wear appropriate personal protective equipment such as protective eyewear and gloves.
Operation Method
- Heating Stage
- Heat the preheated hot plate to the set temperature.
- Aim the weld face of the plastic part at the hot plate so that it is heated in direct contact with the hot plate.
- Control the heating time to ensure that the material melts evenly on the contact surface.
- Remove the Hot Plate
- Remove the hot plate quickly after the material has reached the proper level of melting.
- Pressing Stage
- The melted plastic parts are quickly aligned and pressed together.
- Apply appropriate pressure to ensure that the two parts are thoroughly fused.
- Cooling and Curing
- Maintain pressure until welded joints are cool and fully cured.
- Upon completion of the weld, inspect the weld for quality and integrity.
Tips to Get the Best Results from Plastic Welding
Plastic welding is a highly technical work, a variety of factors affect the welding quality and efficiency. Matters that require special attention when performing plastic welding:
Tip 1- Material Compatibility
- Ensure good compatibility between the plastic materials selected. Different types of plastics may not be suitable for welding together due to differences in their chemical properties and melting points.
- Knowledge of material properties such as melting point, heat distortion temperature and chemical stability to select appropriate welding methods and parameters.
Tip 2- Cleaning and Preparation
- Thoroughly clean material surfaces before welding. Dust, grease and other contaminants can seriously affect the quality of the weld and may result in a weak or uneven weld.
- For some high-precision requirements, special treatment of the welding surface, such as grinding or chemical treatment, is also required to enhance the welding effect.
Tip 3-Control of Welding Parameters
- Precise control of welding temperature, time and pressure. These parameters will directly affect the strength and appearance of the weld.
- Avoid overheating, as excessive temperatures may cause the material to scorch or decompose, producing harmful fumes.
Tip 4-Operator Skills and Safety
- Ensure that you are professionally trained in the fundamentals of welding and operational techniques before starting work.
- Take care of personal safety protection and use appropriate protective equipment such as protective eyewear, gloves and masks.
Tip 5-Post-Processing and Inspection
- Upon completion of welding, the welded joints are properly cooled and post-treated, such as removal of flying edges, leveling and cleaning.
- Perform weld quality checks, such as visual inspections, mechanical testing, or use of non-destructive testing techniques, to ensure that the weld quality meets the requirements.
Tip 6-Fixture Design
- The precision of the jig is an important device to ensure the quality of plastic welding, the design of the jig and the choice of material is very important.
- Reasonable fixture design can improve productivity and reduce manufacturing costs.
Conclusion
Plastic welding is an efficient and widely used technique for a variety of applications. With proper methods and precise temperature control, plastic welding can create strong, durable and aesthetically pleasing joints. If you have a better welding technique you would like to discuss with us. Tirapid team would like to share more advice and experience in plastic welding with you.
FAQs
How to choose the right welding technique?
Choosing the right welding technique depends on the type of plastic being used, the strength of the joint required and the end use of the product. Common welding techniques include hot gas welding, extrusion welding, ultrasonic welding and laser welding.
How does plastic welding differ from metal welding?
The main difference between plastic and metal welding is the thermal properties of the materials used. Plastics have a lower melting point and usually do not require high temperatures to achieve a weld, whereas metals require higher temperatures. In addition, plastic welding does not usually produce the same light and fumes as metal welding.
What materials are suitable for plastic welding?
Almost most thermoplastic materials can be seen are suitable for welding, such as PE, PP, PVC, Nylon (PA66), ABS, acrylic, PC, POM.
